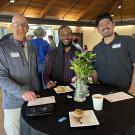
UCDHS EH&S UC Davis Home VC Admin Home
Architects & Engineers Home Emergency/Disaster Management Fire Department Home Operations & Maintenance Home
UC DAVIS - Veterinary Care Program
UC Davis - EH&S
Animal Use and Care

UC Davis Veterinary Care Program
Moo!

Office of the Attending Veterinarian
Swine Handling and Laboratory Skills Class
Sherri Goss, RVT, RLATG


Part I
Lecture – Husbandry and Animal Care Techniques for Swine and Pork Quality Assurance guidelines

PowerPoint – Humane Handling and Laboratory Techniques for Swine

Part II
Demonstration – Swine Handling and Commonly used Laboratory Techniques

A. Handling and Restraint.
 
1. Coax with food
2. Panepinto Sling
3. Transport Cart
4. Hog board
B. Sexing.
 
1. Presence of testes
2. Ventrally located penis
3. Presence of vulva below anal opening
C. Injection Techniques.
 
1. Subcutaneous (SQ, SC) – at the base of the ear.
2. Intramuscular (IM) – Neck muscles or glute muscle (non-meat animals only).
3. Intravenous (IV) – Marginal Ear Vein.
D. Blood Collection.
 
1. Central Ear Artery.
2. Jugular Vein.
3. Anterior Vena Cava (Anesthesia recommended).
4. Intracardiac – (IC) (Terminal Procedure, must be anesthetized).
Part III
Participant Handling and Laboratory Techniques for Swine.

Section II Part A – Swine are gregarious and social. A normal behavior for pigs is the "rooting" movement, wherein pigs tuck their heads low and then quickly raise up their head, trying to "root up" whatever they are pushing with their snout. Pigs approach a sitting or kneeling person more readily than a person who is standing. Pigs will usually grunt, bark and squeal when agitated. Mouth chomping usually precedes aggression. The key to working well with pigs is to use proper restraint and rewards, never punishment, and to be calm, relaxed and patient. Avoid trying to restrain a pig on a smooth or wet surface. To avoid injuries to pig’s legs, use rubber mats.


1. Manual Restraint.
 
a. Coax with food – Pigs can be coaxed with a bowl of food to come out of their cage, move into a transport cart or new cage and to remain calm and still in a sling. A bowl of food can also be used to administer oral medications and used as a distraction if administering an injection. Feeding times can be coordinated with medication times so the pig is not overfed.
b. Panepinto sling – This sling, which looks like a hammock, has four cut out holes in it to place each of the pig’s legs into. This restraint device works well for giving injections, taking blood and for inducing anesthesia. The pig’s body temperature must be monitored if it will be restrained for more than 15 minutes. The deep layer of insulating fat prevents efficient heat dissipation.
c. Transport Cart – These stainless steel carts work well for moving large, heavy pigs to another cage or area. The carts are on wheels and are easy to maneuver. Pigs can be trained to move out of their cage and into the transport cart by using food as a reward.
d. Hog Board - Pigs are best moved in a transport cart designed for use with large animals. At times this is not possible and pigs must be walked to their destination. When moving a pig always remember pigs will move away from walls toward openings. This is an advantage since one can use a "hog board" to simulate walls. The board is fashioned with a handle so that one can place it to the side, rear or front of the pig to direct them. Excessive force should not be needed to move a pig and is mostly counterproductive as pigs will become excited and belligerent. It should be remembered pigs will refuse to move if the place you wish them to go is dark (e.g. from daylight into a dark room). Often the use of the hog board may be used to stop a pig and slow them down if they are moving too rapidly. The board may also be used to restrain a pig in a corner while minor procedures (injections) are performed. The size of the board varies depending on the size of pigs used and application. In general if the board is at least as tall as the pig and 2/3 to about as long as the pig it will usually sufficed.


Section II Part B – Swine can be easily sexed by visualizing their external genitalia. Boars (male swine) have large testes easily seen when standing behind them. Boars have an obvious penis located on the ventral abdomen. Gilts (female swine that have not bred) can be sexed by visualizing their vulvas just below their anal opening. Sows (female swine that have given birth) have large mammary development from nursing their piglets.
Section II Part C
1. Subcutaneous (SQ, SC) – Have all of your supplies ready before restraining the pig. Always wear gloves. Restraint can be achieved using a bowl of food for distraction or by using a hog board or sling. Do not use food if administering anesthesia! Grasp the loose skin behind the ear with your thumb and index finger. Insert the needle or butterfly catheter (25-22 gauge w/1cc syringe) in the fold of skin between your fingers. Pull back on the syringe to insure proper placement. Blood in the syringe indicates improper placement. Withdraw the needle and start the procedure again using fresh supplies. When proper placement is achieved, a small air bubble will appear in the syringe upon aspiration. Administer the injection (0.5mls sterile water or saline) in a steady flow. If the fluid runs down along side the animal, the needle went through the other side of the skin. The procedure must be started again with fresh supplies.
2. Intramuscular (IM) – Have all of your supplies ready before restraining the pig. Always wear gloves. Restraint can be achieved using a bowl of food for distraction or by using a sling or hog board. Do not use food if administering anesthesia! Locate either the large mass of neck muscle or the glute muscle (non-food animals only) for the injection site. Insert the needle (25-22 gauge w/1cc syringe or 25-22 gauge butterfly catheter w/1cc syringe) into the muscle in a decisive motion. Pull back on the syringe to insure proper placement. Blood in the syringe indicates improper placement. Withdraw the syringe and start the procedure again using fresh supplies. When proper placement is achieved, a small air bubble will appear in the syringe upon aspiration. Administer the injection (0.5mls sterile water or saline) in a steady flow. Massage the injection site to relieve any discomfort.
3. Intravenous (IV) – Have all of your supplies ready before you restrain the pig. Always wear gloves. Make sure there are no air bubbles in your syringe before you inject your solution. You will need good restraint for this technique! It may be necessary to use a sling and food for distraction to give the injection. Do not use food if administering anesthesia! Applying EMLA over the ear vein for local anesthesia (30-60 minutes before collecting your sample) is helpful as well. Locate the marginal ear vein. Prep the area with alcohol. Have a handler hold the vein closest to the head. Insert the needle (25-22 gauge needle w/1cc syringe or 25-22 gauge butterfly catheter) into the marginal ear vein. Pull back on the syringe to insure proper placement. You should get a flash of blood in the syringe. Have the handler release their hold on the vessel before you administer the injection. Administer the injection (0.5mls sterile water or saline) into the marginal ear vein in a slow, steady motion. Remove the needle and place gauge square over the injection site for approximately one minute. Make sure bleeding from the site has stopped before returning the pig to its cage.
Section II Part D
1. Central Ear Artery – Have all of your supplies ready before you restrain the pig. Always wear gloves. You will need good restraint for this technique. Using a sling and a bowl of food for distraction works well for restraint. Applying EMLA over the ear artery for local anesthesia (30-60 minutes before collecting your sample) is helpful as well. Have the handler hold off the artery closest to the head. Prep the area with alcohol. Insert the needle (25-20 gauge needle w/3cc syringe or 25-20 gauge butterfly catheter w/3cc syringe) into to the artery. Pull back on the syringe to insure proper placement. Blood in the syringe indicates proper placement and you can safely collect your sample. Collect the desired sample amount (1.0mls). Before removing the needle, have the handler remove their hold on the vessel. Remove the needle and place a gauge square over the collection site for approximately five minute (it may be helpful to apply a pressure bandage that can easily be removed after 5 minutes). Make sure bleeding has stopped before returning the pig to its cage.
2. Jugular – Have all of supplies ready before you restrain the pig. Always wear gloves. You will need to use a sling and have a handler hold the pigs head up. Place your thumb into the jugular furrow. Unlike in other species, the jugular vein in pigs does not readily stand out. Often it is a blind technique. Prep the site for collection. Insert the needle (25-20 gauge w/3cc syringe) into the jugular vein. Pull back on the syringe to insure proper placement. Blood in the syringe indicates proper placement and you can safely collect your sample. Collect the desired sample (1.0mls). Release your hold on the vessel with your thumb before withdrawing the needle. Place a gauge square over the collection site for approximately one minute. Make sure bleeding has stopped before returning the pig to its cage.
3. Anterior Vena Cava – Have all of your supplies ready before you restrain the pig. Always wear gloves. It is recommended that the pig be anesthetized before the procedure is started. Place the pig in dorsal recumbency. Prep the area with alcohol. Insert the needle or vaccutainer (22-20 gauge 1-1 ½ w/3cc syringe) cranial to the breast bone, just to the right of the mid-line, to avoid injury to the vagus nerve and the thoracic duct. Keep negative pressure on the syringe as you advance the needle forward so blood will stream into the syringe as soon as the vessel is punctured. Collect the desired sample (1.0mls). Withdraw the needle and place a gauze square over the collection site for approximately one minute. Make sure the bleeding has stopped. Place the pig in a transport cart or in a cage for recovery. Monitor and record the pig’s heart rate, respiration rate, and body temperature every 15 minutes until sternal. Turn the pig from right to left lateral recumbency every 15 minutes until the pig is sternal. Provide a heat source if the pig becomes hypothermic.
4. Intracardiac (IC) – Have all of your supplies ready before you restrain the pig. Always wear gloves. The pig must be anesthetized before the procedure is started. Place the pig in dorsal recumbency. Locate the xiphoid process at the base of the sternum. Prep the area with alcohol. Insert the needle or vaccutainer (20-22 gauge 1 ½ to 2 inches in length) under the xiphoid process slightly off center towards the animal’s left side. Insert the needle at a 30 degree angle. Maintain slight negative pressure on the syringe as you insert the needle so blood will stream into the syringe as soon as the heart is punctured. Collect the desired sample (this technique is used for exsanguinations). After the sample amount is collected, the animal must be euthanized using an AVMA approved method.


Untitled Document

Office of Environmental Health & Safety
University of California, Davis
One Shields Ave
Davis, CA 95616
530-752-1493
ehsdesk@ucdavis.edu